Survey Plan Layer Commands
R3Survey provides several commands for creating and managing survey plan layers and settings.
R3PL — Create survey plan layers
Command: R3PL
Creates all component layers for one or more survey plans in the current drawing. Run this before drawing or importing data for a new plan.
Usage
- Type
R3PL - Enter a plan number (e.g.
DP123456) and press Enter - Repeat for additional plan numbers
- Press Enter (empty) or Esc to finish
R3Survey creates all configured component layers for the plan (Boundaries, Easements, Reference Marks, etc.) and assigns the next available plan colour.
Note
Configure components in R3PLANLAYERSETTINGS before adding plans — components cannot be deleted once a plan has been created.
R3PLANLAYERSETTINGS — Survey plan settings
Command: R3PLANLAYERSETTINGS
Opens the Survey Plan Settings form. From here you can configure plans, components, and colours for the current drawing.
The form has three main tabs:
| Tab | Purpose |
|---|---|
| Plans | Add, edit, or remove survey plans in the drawing |
| Components | Define component types (Boundaries, Easements, etc.) and their default layer properties |
| Colours | Configure the default colour sequence used when adding new plans |
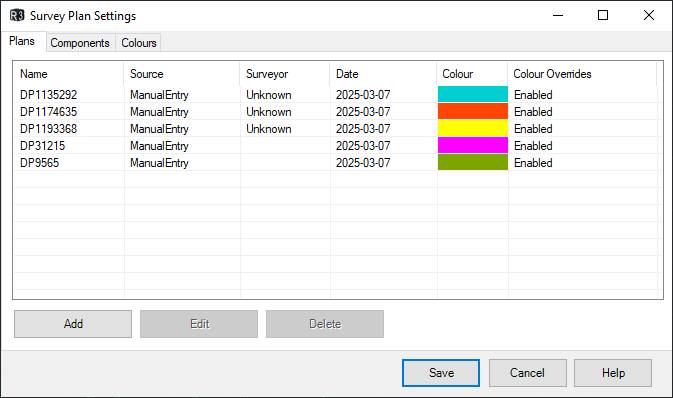
Plans tab — shows all survey plans in the current drawing:
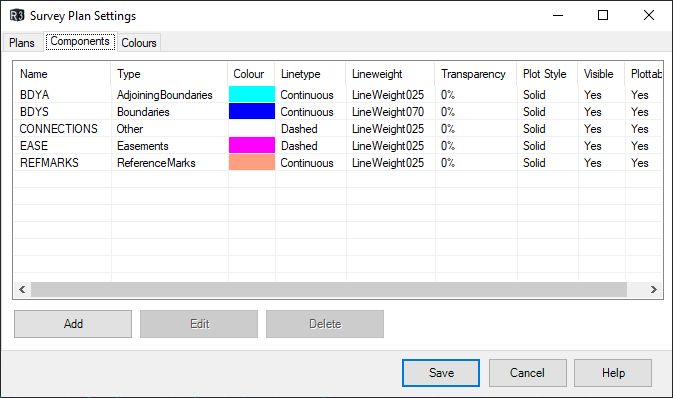
Components tab — define the layer types created for each plan:
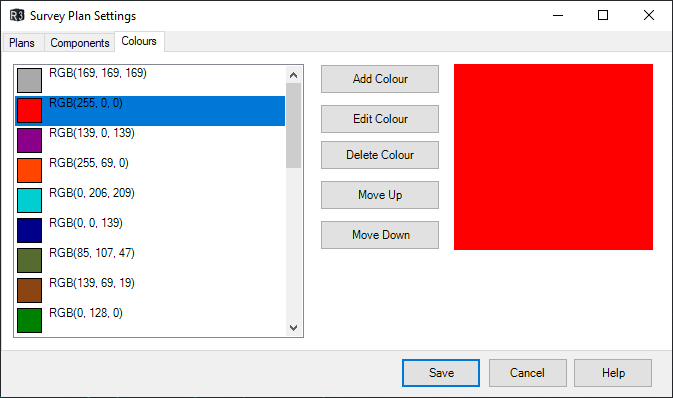
Colours tab — configure the colour sequence for new plans:
When adding or editing a plan, an Add/Edit dialog lets you specify the plan number, coordinate system, and NSW LRS administration details:
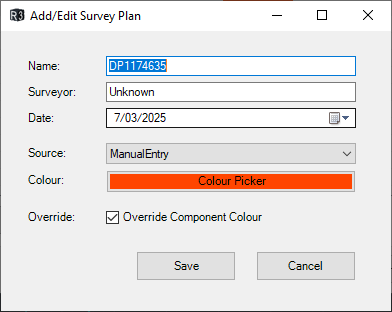
The Add/Edit dialog fields:
| Section | Field | Description |
|---|---|---|
| Identity | Name | Plan number (e.g. DP123456). Required |
| Surveyor | Surveyor's name | |
| Firm | Survey firm name | |
| Reference | Surveyor's job/file reference number | |
| Date | Date of survey | |
| Source | Plan source type | |
| Colour | Plan display colour | |
| Override | Override component colours with plan colour | |
| Coordinate System | Datum | MGA2020, MGA94, MM, or Local |
| Zone | MGA zone number (54, 55, or 56) | |
| Orient. Plan | Orientation plan number (only shown when Datum is MM) |
|
| Vert. Datum | AHD, MSL, WGS84, or Local |
|
| Survey Type | surveyed or compiled |
|
| Scale Factor | Combined scale factor | |
| NSW LRS | LGA | Local Government Area |
| Parish | Parish name | |
| County | County name | |
| Locality | Locality name | |
| Region | Survey region — Urban or Rural |
|
| Purpose | Purpose of survey (43 NSW options) | |
| Plan Heading | Multiline description of the plan |
These fields are used by R3EXPORTLANDXMLNSW to populate the LandXML header. See NSW Digital Plans — survey plan metadata for details on how each field maps to the export.
R3CREATESURVEYPLANBLOCK — Create block from plan
Command: R3CREATESURVEYPLANBLOCK
Groups all objects belonging to a survey plan into a single AutoCAD block. This makes it easy to move, rotate, or overlay plans in the drawing.
Usage
- Type
R3CREATESURVEYPLANBLOCK - Select any entity belonging to the plan
R3Survey identifies all entities associated with the same plan and creates a block. The block can later be exploded while preserving all entity properties and XData.
R3TOGGLEPLANOVERRIDES — Toggle colour overrides
Command: R3TOGGLEPLANOVERRIDES
Toggles the Override Component Colour flag for the currently active survey plan. When enabled, all component layers for that plan adopt the plan's assigned colour instead of their individual colours.
Use this to quickly switch between per-component colours (showing detail) and a uniform plan colour (for clarity when multiple plans are overlaid).
R3FO — Place folio (lot reference) labels
Command: R3FO
Places folio lot reference labels as MText on the LOTS-TEXT layer. Supports all standard NSW lot reference formats and includes shortcuts for placing sequential lot numbers quickly. Text height is automatically scaled to 3.5 mm plotted based on R3DWGSCALE.
Folio formats
Enter the lot reference using / as a separator between lot, section, and plan number:
| Input | Format | Example output |
|---|---|---|
LotNo/PlanNo |
Lot on a DP | 1 over DP 930430 |
LotNo/SecNo/PlanNo |
Lot in a section on a DP | 16 over SEC 7 over DP 1884 |
SPxxxxx |
Strata plan | SP 54554 |
Usage
- Type
R3FO - Enter the folio reference (e.g.
1/930430,16/7/1884,SP54554) - Pick the insertion point in the drawing
- Pick a second point to set the orientation, or press Enter for horizontal
R3FO loops — press Esc to exit.
Shortcuts
| Input | Result |
|---|---|
| Enter (blank) | Repeat the last folio entry |
+ |
Increment the lot number by 1 |
++ |
Increment the lot number by 2 |
- |
Decrement the lot number by 1 |
-- |
Decrement the lot number by 2 |
AUTO |
Auto-place folios on all DCDB lots in the drawing |
AUTO mode
Type AUTO to automatically place folio labels on all DCDB lot polylines in the drawing. R3FO reads the LotNo, SecNo, and PlanNo XData values stored by R3IMPORTDCDB and places a label at the centroid of each lot polygon.
Note
AUTO mode only works on polylines imported with R3IMPORTDCDB that have the required XData. Polylines without DCDB XData are skipped.
See also
- Survey Plans concept — how plans, components, and colours work
- Survey Plan Layer Commands — hide, show, and isolate plan layers
- NSW Digital Plans — how plan metadata feeds into NSW LandXML export